Ciabatta stuffed with sauteed mushrooms, ham and cheese


I love flavored breads. Actually, I love then just plain. I do love bread in all its shapes and forms, and since I've tried to do at home, I do not need any excuse to get to it.
Flavored breads are magical. They have the ability to transform any meal into something special. They can be a starter, a side dish for a main meal, an accompaniment for dipping, or a wonderful surprise for a  picnic.
Unfortunately,  the weather has been too bad this summer in here.  Anyway, even inside, I will organize a picnic just to take this bread with me. 


Ciabatta stuffed with sauteed mushrooms, ham and cheese

Ingredients (for 1 large loaf)

For the ciabatta

320 ml of water
30 ml olive oil (2 tablespoons)
10 grams of salt (2 teaspoons)
10 grams of sugar (2 teaspoons)
600 grams of bread flour
5 grams of dried baker's yeast

For the filling

Olive oil
2 cloves garlic
300 grams of mushrooms
4 slices of ham
4 slices of cheese (Cheddar or similar)


Preparation

Place ciabatta ingredients in the order listed in the baker machine basket. Select the program for bread, and remove it before cooking begins (after the second raising). Alternatively, if you do not use the bread machine, knead the ingredients, put the dough in a bowl and let rise in warm place, covered by a cloth, until doubled in size (about one hour).
While dough raises, put a couple of tablespoons of oil in the skillet and sauté two cloves of sliced ​​garlic. Saute the mushrooms, cook over medium-high heat to toast, salt and pepper.
Once you have weighed the dough, place on a floured work surface and knead lightly to remove excess gas. Pin out into a rectangle, leaving the dough to a thickness of about one centimeter. Spread the slices of cheese, ham, and mushrooms in the center, forming a central line, without covering the entire surface so that the filling does not overflow the shape.
Roll the dough over itself to make a cylinder. Fold the ends under to seal properly so they do not open during baking. Preheat oven to 180ºC  degrees and put in an oven tray covered with a sheet of silicone or parchment paper, placing the fold of the dough in contact with the tray, so the smooth side is up.
Put in the oven for about 40 - 45 minutes, or until hit the base sounds hollow.

Raspberry and fruits of the forest frozen yogurt


Some time ago I bought an ice cream maker. It is a very basic, simple and cheap model. But the results you can have at home are absolutely brilliant!

The ice cream maker base has a capacity of 1.6 liters, and the amounts I used in this recipe filled almost the entire recipient. Like all ice cream makers in which the base should previously be frozen, it must be at least 12 hours in the freezer. But once the base is frozen, you'll love this recipe because in 30 minutes you can enjoy a creamy frozen yogurt with a perfect result. This recipe is so quick because I use frozen fruit, which allows the mix to go directly into the machine instead of having to wait for it to get cold. Besides, this recipe has very little fat, and although we can not say it's a light recipe you can take every day, it is much lighter than conventional ice cream with much less fat but with a very similar texture and full of flavor with the yogurt and the fruits.
With this result you can imagine how I liked to try it. I still have a few ideas in mind that I really want to try, so there will be more coming.


Raspberry and fruits of the forest frozen yogurt
Ingredients (for about 1.5 liters of frozen yogurt)

400 grams of condensed milk (I used it skimmed)
500 grams fat-free plain yogurt 
300 grams of frozen raspberries
100 grams of frozen fruits of the forest

Note: I used this combination of raspberries and wild berries as it was what I had at home, but you can use your choice to your liking. Even if you use the same fruit, it is interesting to keep a quarter of the amount apart from the mix to keep bits in the ice cream.


Preparation
Beat in the bowl of an electric mixer raspberries with yogurt and condensed milk and mix well. Add the berries, put in the ice cream maker and let the ice cream machine works for 30 minutes. Once it is ready, it can be served directly, or reserved in a plastic container (like the one I used, with lid) and freeze. Take the frozen yogurt out from the freezer 10-15 minutes before serving.

The slim duck, shorlisted for Blog Awards Ireland.

and it just happened!!!! This little blog made it into the shortlist for BLOG AWARDS IRELAND 2015 in the category of Food and Drink.


To say that I am delighted is a massive understatement. I am just so thrilled, and so, so surprised!


Many thanks for considering this small place interesting enough to reach here.
UUUUHHHHHH!
And now, if you feel like voting me, please do. Click the banner on the side or here, and thanks a million already.


Aldmond financiers


Almonds are almonds. It seems quite evident, as a matter of fact. But if you always buy them packed, it is difficult to imagine all the work that lies behind those tiny things. I did not know it  until my uncle's almond trees started to produce. You had to pick the fruit, remove the wrapper it has to leave only the shell, remove the shells one by one, blanch to remove the skin and then finally toast them before eating them. A couple of times he gave us several boxes, and after all the process, my mum prepared an absolutely spectacular nugat. However, I never forget all the work behind those almonds  and they were only a few tens of kilos.


Almond Financiers 


Ingredients (for about 10 units)

120 grams of egg white
125 grams sugar
55 grams of flour
 55 grams of almond flour
zest of 1 lemon
150 grams of butter

Preparation
Heat the butter over high heat in a medium saucepan. When you begin to acquire a tan and the smelle of hazelnut (noisette point), remove from heat immediately to avoid burning and acquiring a darker color. Pass through a fine sieve and let cool.

Mix egg whites with sugar. Add the flour and ground almonds and mix. Slowly add the clarified butter while continuing mixing. Leave this mixture in the refrigerator for 4 hours (or 20 to 30 minutes in the freezer if you are in a hurry). Preheat oven to 180 º.
Paint your moulds with oil, divide dough among them, and bake at 180 º for 15 minutes. Cool on a wire rack and unmold.


Coffee, lemon and cardamom granita


For someone who loves coffee anytime and in almost all versions, coffee granita is a common dessert. In summer it is refreshing and closes a meal by mixing dessert and coffee. Now, it is more or less the same idea. This recipe gives you a point of extra flavor by adding lemon and cardamom. The result is more refreshing thanks to the lemon juice and more intense due to cardamom. If you prepare it  with decaffeinated coffee, you can have it any time without fear of spending the whole night awake. Just a precision: with or without caffeine, coffee for this grantia should always be a good espresso.

Coffee, lemon and cardamom granita
Ingredients (for 2)

1/2 liter of espresso (can be decaf, but espresso)
Sweetener to taste
Juice of a lemon 
1/2 teaspoon cardamom powder

Put the coffee in a metal container that can be introduced in the freezer, add sweetener and taste. It should be rather sweet, because freezing  will make it bitter. Add the lemon juice gradually, testing, and do not incorporate all of it  if it gets too acid. Add the cardamom and mix well. Put in the freezer and stir with a fork every hour or so to prevent freezing altogether.
Serve with a slice of lemon.


Tomato and green apple jam


I must confess that I only learned to eat tomatoes (like so many other things) when I was already grown up. Really grown up, I mean. I was a picky eater as a child, and my poor parents were desperated, especially with tomatoes. I remember just so clearly  my father's frustration whenever he offered me the best of summer ripen tomato, open in half with a little olive oil and a pinch of salt, as the best dish in the world. I was young, but not enough not to realize that I had to do my best to eat it. But for me, it was a viscous thing, with uncertain taste, which I could  never really eat. As soon as I felt it in my motuh, I felt sick, and I could see my father's disappointment. Even today he eats so often tomatoes in summer, freshly picked, chosen at the point that he likes, but now he just does not invite me to try.
I can now eat them, but still they are not one of my favorite snacks. And the proof is that I can only eat them ripe, very ripe.  Still green and crisp tomatoes are a test that I failed to overcome. Another unforgivable stain on my record of culinary tastes.
What I really love  is to make jams and jellies. Never prepare them for preserving, though. At one time in my life I spent too many summers preparing canned fruit so I think I'm done for my entire existence. No, sterilized jars, then boiling and everything else is not for me.


But adding sugar to fruits and allow to slowly cook them in their own juice, for that, I am always ready. In fact, in most recipes that include jam, I prepare it myself at the moment. This way, I can give it the sweetness that I like, and just the texture that is usually lost in the manufacturing process.

And yet, I never did before a tomato jam, even though I wanted long ago. Simply I  had not done it yet. But a few days ago, at the site of Saveur Magazine I  saw this tomato and green apple jam, and I had to try it. Mine is quite different from the original, which is much more spicy and perfect to accompany savory dishes, but I just add green apple as an alternative to the idea I had in mind.
You can see the result below. A highly recommendable jam, not overly sweet, and delicious to replace oil and tomato on toast for breakfast for a couple of days.

Tomato and green apple jam

Ingredients

1 kg. ripe red tomatoes
2 medium green apples (Granny Smith), peeled and diced
500 grams superfine sugar

Directions

Peel the tomatoes: Bring a large pot of water to a boil over high heat.  Score the bottom of each tomato with an X.  Once water is boiling, drop tomatoes in for 15-30 seconds; remove with tongs and immediately plunge into cold water.  Slip off the peels with your hands, then roughly chop the peeled tomatoes. Add the tomatoes, apple, and sugar to a medium saucepan set over medium heat and stir to combine.  Bring mixture to a boil very slowly, then lower heat and gently cook, uncovered, for about 40 minutes, stirring occasionally to prevent scorching, until the mixture is thick and jammy.  When the jam is ready, remove from heat and, if desired, use a  fork to break down tomato and apple chunks to your preferred consistency and leave to cool.

Tip: This jam is perfect on a slice of bread freshly toasted and a little Brie or other creamy cheese. But try also to add a few tablespoons of jam to a vinaigrette for the salad. Mix 3 tablespoons of olive oil, 1 tablesppon apple vinegar and 2 tablespoons of the jam. Salt and pepper, emulsified and pour over salad just before serving. Can not be easier nor tastier.


Chocolate and choco chips ice-cream


Today's ice cream has not got any egg on its base, but it gets an intense chocolate flavor, and crunchy chocolate chips, which against the creamy base are a delicious contrast. Besides, you can prepare it in a moment.


Chocolate and chocolate chips ice-cream

Ingredients (for about 700 ml of ice cream)

200 ml whipping cream (at least 35% m.g.)
125 grams of  plain yogurt
250 ml milk
40 grams icing sugar
40 grams cocoa powder
25 grams of chocolate chips

Whip the cream with half the sugar, beating at low speed first and then up, until it hardens, being careful not to overdo it or it will become butter. Add remaining ingredients, except chocolate chips, whisking until integrate, and test. Correct sugar or cocoa to taste.
If using ice cream machine, put in refrigerator several hours or twenty minutes in the freezer before putting the ice cream, in the machine. Halfway through the process, add the chocolate chips. When the ice cream has curdled, place in a suitable containers for freezing, put into the freezer and finish cooling.


Chicken chilli


I am quite sure that I were Mexican I 'd hardly enjoy those strange distortions on my traditional dishes that you often find as junk food anywhere. Well, most probably, not a single Italian native would recognize in cheese macaroni or American style pizza any familiar flavor, either. Actually, I think I had a similar feeling when some local friends drove me in Munich to eat at an allegedly Spanish restaurant. I'll save you the nasty details, it is not worth remembering such a culinary  aberration.
I have to say that I have rarely eaten better than during a working visit to Mexico City. I truly felt for Mexican cuisine during that trip. What I tried there had little to do with what I had experienced before as an alleged Mexican food anywhere outside Mexico. I especially remember a cold coriander soup (which is shocking, as I can't stand coriander, I am one of those people to whom coriander tastes like detergent instead as like a wonderful herb), but everything, absolutely everything  of what I eat there exceeded my expectations by far.
I am trying to reduce fat and calories on my dishes, so I'm sure that my Mexican friends would eventually think that this adaptation is another unseemly aberration. In advance, my apologies. But I do not want to eat just a bit of lettuce while trying to eat healthier. It's more than possible to eat tasty, or at least modified versions of these dishes as flavorful as the originals. And just one more thing: if you choose to try this option, please, please: just control yourself with your servings of rice or corn tortillas.  If  you manage to do so, enjoy it fully, because it will not disappoint you at all.

Chicken Chili

Ingredients (for 2 people)

1/2 white onion
1 red pepper
1 green pepper
Jalapeño peppers (to taste)
Cayenne pepper powder
2 chicken breasts
400 grams of tomato (skin and seed cleaned) and diced -(you can also use canned ones)
Olive oil (if you get used to spray, it will save you many calories!)
Half cup chiken broth (or the same amount of water with quarter a cube of stock)
1 teaspoon soda bicarbonate


Preparation

Put a few olive oil sprays into a deep saucepan. Heat and slowly fry the chopped onion, very smally diced. Add a few tablespoons of water when onion starts to get brown, and let it cook slowly. Add the peppers, chopoped into very small cubes, and if necessary, add a little more water, so that they cook slowly over medium heat. Chop the chicken breasts in a blender or by knife, until they have the consistency of ground beef. Add to skillet and brown over medium-high heat, stirring continuously. When browned on the outside, optionally, add half a cup of broth (or half a stock cube and half a glass of water), reduce heat and simmer about 10 minutes. Add  diced tomatoes (fresh or canned, but not puréed), and cook about 15 -20 minutes over medium heat with some chopped jalapenos and half a teaspoon of chilli powder (or more, depending on how spicy you like your chilli) Add a teaspoon of soda bicarbonate instead of sugar if your tomato is acid. Test, add salt and pepper if necessary (if you use broth or chiken stock, check it out because it is already salty and it would probably be enough). Enjoy!

Oatmeat and cranberries guilt-free cookies

Since I'm trying to lighten my diet I have been missing terribly a little baking. Not so much the taste of something sweet (well, might be a little) as the need of baking something delicious, sweet but not too much, that I could have with  my coffee without completely destroying my new good habits. Baking is indeed a chemical reaction in which each element -from the type of flour to the yeast, liquids and fats- work and react to heat from the oven to achieve the final result. So it is not easy to replace ingredients and make recipes lighter without a too saggy result, either in flavor or texture, or appearance or in all of them.  At least, for me it was not so simple.


While looking for a small treat under control, I came up with these cookies. The oats provide carbohydrates so you can not say that they are low in calories, but they have a sensible amount of sugar, along with dried fruits, one single egg and purée apple in place of butter or oil. So, I think they result in a more than acceptable flavor and texture, while still being reasonable from a dietary standpoint, especially if you eat only one at the time.

Conclusion: cookies can be made differently. Puréed apple does not add much apple flavor but they make the inside juicy, while oats keep the cookies crisp and cranberries give them a fruity and slightly acidic touch.

And most importantly: you can eat guilt-free, good-for-you cookies.


Oatmeal and cranberries cookies
Ingredients (for about 12ish cookies)


120 grams of  oatmeal
1 medium apple
1 egg
25 grams demerara sugar (or equivalent sweetener)
2-3 tablespoons dried cranberries

Preparation

Preheat oven to 180 degrees. Peel and slice the apple. Cook in the microwave for 5 minutes, until apple is soft enough to mash with a fork and makes easily a puree. If  it is not cooked, just add 1 minute at the time, check and stop before adding more time. Mash the apple, working well with a fork, and let cool to room temperature.

Put in a bowl the oats, cranberries and sugar and add the apple puree. Beat the egg and add. Mix all ingredients.
On a baking tray covered with a sheet of baking paper or silicone, put spoonfuls of dough a bit apart.
Bake for about 12-15 minutes or until they get consistence and are slightly brown on the surface.

TIP: Alternatively, if you prefer, you can add cranberries (or other dried fruit you use) on top of each cookie rather than mixing into the dough. Try raisins, desicated coconut or kiwi, chopped dried apricots, or any dried fruit you like. You can also add fresh or frozen berries and it would go well: raspberries, blackberries and currants.

Light moussaka

Even before I got familiar with the expression "comfort food" I already knew it existed.
Not the expression itself, but the feeling of food that automatically warms you up, food that makes you feel good when you first taste it, food that can solve almost, almost any problem, present or future; Food that will warm your body and soul at once.
In my personal comfort food category there are quite many things, as to get into that category all they need is just to put a smile in my face.
In this category there is always a place for moussaka.
What I have done in today's recipe is just a leaner, cleaner version of the traditional one, but still with all its comforting filling –and taste! So, I have significantly reduced the fat by substituting beef for chicken and turkey, and I have changed béchamel by a sauce made with yogurt. Although you might think that it does not sounds appealing at all, believe me: you should give it a chance. Even as light and reduced in fat, this version is still one of those dishes that will cheer your stomach every time.
 It will be nice as prepared, but will get into perfection overnight. It  freezes wonderfully (with the only precaution of freezing it without the yogurt sauce). You can double the amount and freeze one moussaka without the yogurt sauce. When you want to have it, add the sauce and re-heat as needed.
Just one tip: as you will need some time for the yogurt to release the serum you have to do this step at least a few hours earlier. Best if you leave it running down overnight in the fridge and prepare directly the following morning.
Then, just prepare to open your comfort food repertoire to a clean take on the traditional moussaka.


Light moussaka
Ingredients (4 to 6 people)

250 grams plain non-fat yogurt
500 grams ground turkey (or chicken or mix of both)
1 onion
1 clove garlic, minced
1 teaspoon ground cinnamon (1/2 if you are not too fond of spice)
1 teaspoon coarse salt, plus more for the aubergines
1/4 teaspoon ground nutmeg
1/4 teaspoon freshly ground pepper
1 can (400 grams) chopped peeled tomatoes
1 tablespoon chopped fresh oregano (or 1 teaspoon dried oregano)
2 medium aubergines (about 500 grams)
50 grams grated Parmesan cheese
1 large egg plus 1 large egg white
Olive-oil cooking spray

Directions

Drain the yogurt in a cheesecloth-lined sieve until thickened, (2 hours or overnight). Place the turkey in a medium saucepan over medium heat; cook until browned, about 6 minutes. Using a slotted spoon, transfer to a medium bowl. Add onion, garlic, cinnamon, salt, nutmeg, and pepper to the saucepan; cook until onion is translucent, about 10 minutes. Return turkey to saucepan with tomatoes and oregano. Bring to a boil; reduce heat to medium low; simmer until sauce has thickened, about 1 hour. Remove from heat; set aside.
Preheat your grill. While the stuffing cooks, cut the aubergines into slices, longitudinally. Sprinkle with salt on both sides. Place in a colander over a bowl; let stand to drain. Discard liquid; rinse each slice under cold running water to remove all salt and juice (this is the classic way, as they say aubergines will be bitter unless you do this. However, in my experience, you can perfectly live skipping this step, so, if you do not have the time, just skip it altogether without fear of any catastrophe).  Dry the slices on  paper towels. Lay the dry slices on a clean baking sheet; coat with olive-oil spray; grill until browned, about 2 minutes. Turn; coat with olive-oil spray; grill again until browned, about 2 minutes more. Repeat until all aubergine slices have been grilled; then, set them aside.
Place the drained yogurt in a small bowl. Add parmesan and the eggs. Whisk together briskly with a fork and set aside.
Preheat the oven to 180ºC degrees. Then, assemble the moussaka: Place a layer of aubergine on the bottom of an 20 cm by 20 cm baking pan. Cover with half the turkey sauce. Place another aubergine layer, then the remaining turkey sauce. Add a final aubergine layer; cover with the reserved yogurt mixture. Bake until the mixture is bubbling and the top starts to brown, (about 30 minutes). Transfer to a heat-proof surface; let sit until the moussaka cools slightly and firms, about 10 minutes. Cut into squares; serve.


Yogurt and raspberries ice lollies


It should be warm.
It is July, come on-
But if it were much warmer we´d probably have to talk about the heat, and would feel terribly strange, because heat and lovely weather more than a couple of days in a row are extremely rare in this part of the world. 


My inner Mediterranean child cannot think of July without icecream, sorbets and frozen treats. So I needed a very quick frozen fix just to remind myself that, after all, ice lollies will forever be the taste of summer- 

Happy summer.


Yogurt and raspberries lollies
Ingredients (6 units)

500 grams  natural yogurt (full fat or skimmed, as you prefer)
2 spoonful of sugar (or swetterner to taste)
A handful of raspberries (fresh or frozen)

Mix well the yogur and sugar and fill half way the lollies moulds with the mix. Add some raspeberries and complete with the rest of the yogur. Add the sticks and put into the freezer for at least 4 hours, or preferibly, overnigth.


Naturally flavoured water


It has never been a problem for me to have my 8 water glass a day. I do not need to remind myself to drink water,quite the contrary.
Wherever I am, I have a mug or a glass, or a bottle that I drink along the day.
This late summer I decided to give a note of flavor and color to the water. Actually, this is an idea you can use whenever you miss summer.
And, on top of it, a very simple test with an idea that also brings color to the table, becoming a table center piece effortlessly.


All you have to take into account is that water really gets flavored, so keep that in mind when combining it with your dishes.
It is not exactly an infusion, not that much, but you will notice the taste for sure.
These photos are two of the bottles I prepared at the same time and got to photograph, but you can really do almost as many combinations as you like.


I prepared some water with cucumber and lime, which is perfect for starting your meal, with a salad, gazpacho or the like, as cucumber and lime add a refreshing touch the water.


And to continue, or take in the afternoon, or really, when you want, there is the other one which has raspberry and basil. The raspberry gives it a touch of acidity, basil puts the perfume.

The preparation could not be simpler and you could not have a more dramatic result with less effort. What about you, what do you put on your late summer water?


Naturally flavored water

With lime and cucumber

Ingredients

1 liter of mineral water (so it has no taste of its own)
1 cucumber (there will be letfovers)
1 lime

Directions

Thoroughly wash the lime and cucumber, dry. With a mandoline or a vegetable cutter, cut the cucumber thinely, lengthwise. You will need 6 or 8 will of these, depending on how intensely flavored you like it. Cut the lime into quarters. Put ingredients in a wide-necked bottle that can go to the fridge and fill with water.
Leave in the refrigerator at least 12 hours, preferably 24.
Serve with plenty of ice.


With raspberry and basil

Ingredients
1 liter of mineral water
2 handfuls of raspberries (in my case, frozen.)
Fresh basil leaves.

Preparation

Wash the basil and cut the stems, leaving the whole leaves. Put the basil leaves together with raspberries in a wide-necked bottle that can go to the fridge, and let it rest to absorb flavor (and color in this case) between 12 and 24 hours. Serve with plenty of ice.

Green asparagus and strawberries salad


This recipe should be called "How to enjoy seasonal products in a minute, resulting in a spectacular flavor and without complication". It is, in fact, my own wish of puting spring into a dish what made this salad to work so well. I love green asparagus. It is true that now you can find them most of the year on the shelves of the supermarket, but when their season arrives, my mouth waters just thinking of their taste grilled. Strawberries are also around, covering all the selves as their season is so short, but so intense.  So, now strawberries and asparagus are at their peak, and you have no excuses to make this salad in a couple of minutes. I guarantee you will not leave you indifferent. Moreover, the strawberries with their sligthly acid flavor work well in salads, so even if you want just add some strawberries to your lettuce, you will change your salad and it will become a really spring salad.
Ensalada de fresas y espárragos con queso feda

Strawberries and asparagus salad with feta cheese

Ingredients

A bunch of asparagus
A handful of strawberries
Feta cheese
Extra virgin olive oil
Coarse sea salt or salt flakes

Ensalada de fresas y espárragos con queso feda

Preparation.

Clean the asparagus, cut the hard part of the stem. Wash them thoroughly and blanch in a pan of boiling water for 20 seconds. Go through the cold water to stop cooking. Dry and grilled. Add salt.
Wash and cut strawberries. Dry them well.
Place asparagus on a plate, spread over strawberries and finished with crumbled feta cheese. Dress with a splash of extra virgin olive oil.

Apple, pine nuts and raisins salad


I warn you from this moment. I have made a little discovery and I'm persistent. From now on you are going to find here more than a salad with fruit. Yes, I know I am not discovering the wheel. But what can I say: I have discovered many possibilities in these combinations. The principle was simple. This competition for cooking with apple made me start with this idea, and then one thing leads to another, a spring that is playing peek-a-boo, like a baby, hiding just behind her hands pretending to have disappeared, and it began to get out delicious combinations: simple, clean, and very, very tasty, to change the typical green salad for other quite different.

The best thing about this salad, no doubt, was the dressing. I had tried other times with a yogurt-based dressing, but until today it had not be so successful. I believe that twist is in a really good extra virgin olive oil, and-strangely enough- in using non-fat yogurt. Yes, I know it may sound strange, but non-fat yogurt has less flavor and makes the dressing be much better.

There are no excuses for you not to try this salad, simple but absolutely delicious to start a meal. If you serve the slices back on top of each other, with the apple shape, I assure you will have a remarkable dish with nearly no effort. few simple things you seem more appetizing.

Apple, raisins and pine nuts salad.

(Ingredients per person)

1 apple
Raisins
Pine nuts

For the dressing (for 2-3 people)

1 non fat plain yogurt (125 grams)
2 tablespoons extra virgin olive oil
2 teaspoons white wine vinegar
Salt
Black and pink pepper

Preparation

Thoroughly wash and dry apples. Discourage, cut into thin slices and dip in a bowl of water with a squeeze of lemon juice until ready to use, so they do not get dark.
Pass the pine nuts for a pan. No need to add oil. The fat of the nuts will be enough. Toast lightly.
Prepare the vinaigrette by mixing the yogurt with the oil, vinegar, salt and peppers. Test and rectify if necessary.
Place apple slices on a plate, preferably, trying to reassemble the apple. Add raisins and pine nuts to each dish and dress with vinaigrette. Serve the remaining sauce separately.

Cinnamon chocolate walnuts


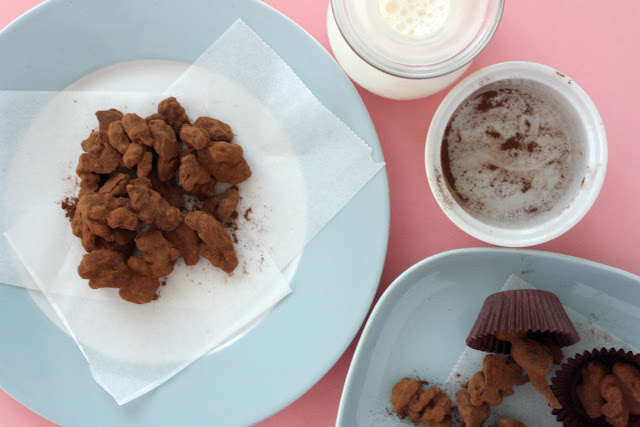
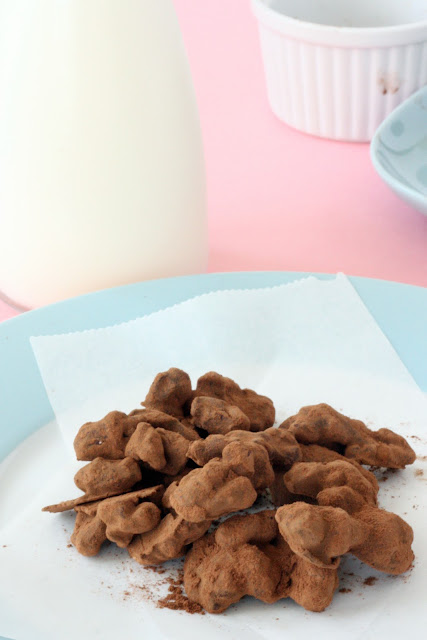
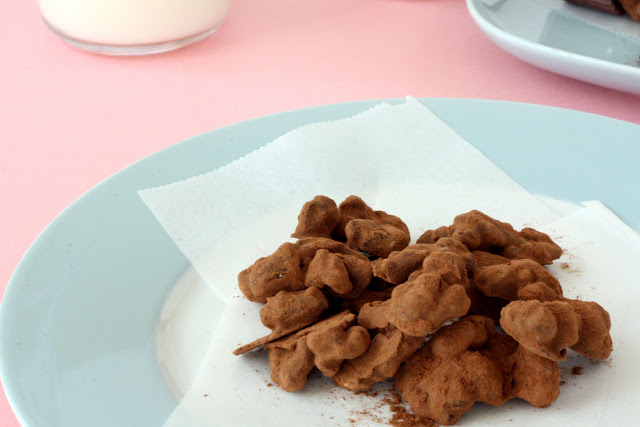
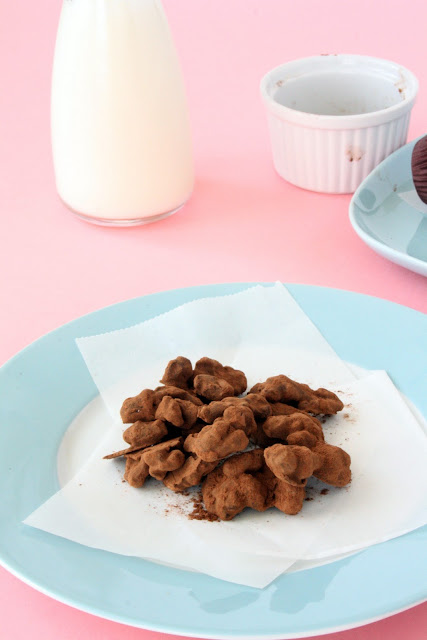
Smells have an evocative capacity much more powerful than any other form of memory. A song, a phrase, a picture, can bring back memories, but a scent transports you to the moment itselft. It fills your brain, forcing you to close your eyes. You breath deeply and you think you are living back those memories. It happens to me specially with cinnamon. Smelling a bit of cinnamon instantly transports me to endless afternoons of games that ended with a rice pudding or homemade custard, and a huge smile appears in my mouth, exactly the same kind of smile that appears now.  I had not tried to combine cinnamon with chocolate and nuts before but for sure it is a winning combination. I wanted to try this recipe since I saw it in  Green Kitchen Stories, a   wonderful vegetarian blog. I  only added cardamom, and I think it just improves the combination. 


Cinnamon chocolate nuts 
 
200grams walnuts
100 grams dark chocolate
1/2 teaspoon cardamom
1 tablespoon cinnamon (powder)
1 tablespoon  unsweetened cocoa powder


Preparation
Melt roughly chopped chocolate in a bowl over steaming pot of water on medium heat Add cardamom, stir on heat until melted and smooth. Toss the walnuts a few at a time in the melted chocolate, and transfer onto a parchment paper or a silicon sheet  to cool.
Mix cinnamon and cocoa powder in a small freezer bag. Toss the set chocolate covered nuts in the powder until evenly coated.