Auberginies with spicy yogurt lemon sauce


I love aubergines. And not, this is not a side effect of any of Ottolengi’s books. 

It probably has something to do with the 10 years I lived in Mallorca. Aubergines are a central product in Majorcan food. In the middle of the Mediterranean, so closed to Middle Eastern influences because of their proximity, but also because historically Balearics were a mixing pot of cultures, you can find a very large amount of traditional recipes with aubergines in there. 

Today’s dish is a mix of traditional aubergines with a different sauce. This is a really good version for when you are craving a fresh, full with vegetables and nutritious meal, with a quick and easy sauce to put on top. 

Directions are simple, you will not need a lot of ingredients, and satisfaction is guaranteed. 

So, for those of you, who are - like me- in love with this vegetable in any possible way, just enjoy:


Auberginies with spicy yogurt sauce

2 large auberginies
2 garlic gloves
4 tablespoons of extra virgin olive oil
A good handful of parsley
125 ml greek natural yogur
Juice of half a lemon
1 fresh chili pepper
Sea salt. 

Wash the auberginies and open them in the middle, longwise. Make some cuts in the pulp with the point of a knife. Add a bit of salt, and put them with the skin up, for about an hour, on a large colander, so that they loose that first water.
In a large saucepan, put 3 tablespoons of olive oil and heat. Add the auberginies, with the pulp touching the saucepan. Let them cook at medium-low heat, for about half an hour. Once their are tender, put them in an oven proof  dish, with the pulp facing up, add some drops of olive oil, and the finelly chopped garlic and the parsley. Put under the grill for 10 to 15 minutes.
Prepare the sauce mixing the yogurt, with one chopped garlic clove and the finely chopped chili pepper. Add salt and black pepper, and the lemon juice. Serve with a bit of chopped parsley and some drops of olive oil on top.


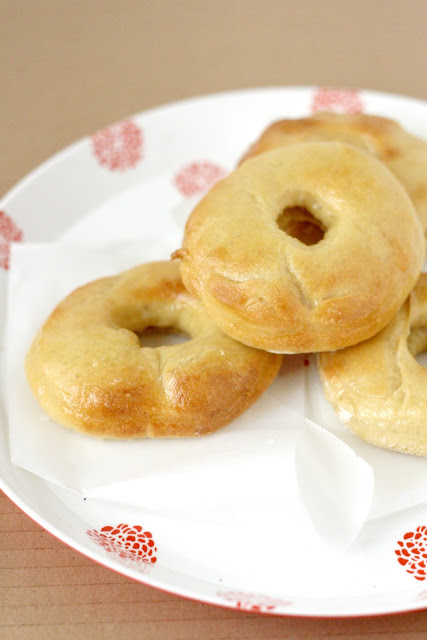
Baked Doughnuts


I've never been a big fan of doughtnuts. In fact, I can spend months without eating them, but from time to time, I taste the first bite and then I devour them as if there were nothing else to eat in the world. Is totally unconscious. Usually, I finish one this way and forget about them for months afterwards.
I was a bit lazy on ​​making doughnuts at home. There is one thing I dislike specially about them, and it is that they are deep fried into abundant hot oil. And this is something you do not want to do in June at the seashore, with your bikini count down already going on.


So I decided to take a mid-way,  and put them in the oven instead of frying in oil. Well, the result is hardly the same, I am not fooling myself, but I think it's not a bad compromise. And you can freeze them (I recommend it, or you'll end up eating them all at once, trust me) and make the illusion that it is not so terrible if you just take one.
These also are not that sweet, so you can freeze them and when de-frezing for breakfast you can fill them with cheese, or cream, and some fruit, or whatever you like.

I adapted this recipe from Lara Ferroni's blog, a real doughnuts specialist herself. I should confess that  what attracted me the most in this blog were her spectacular photos far more than the doughnuts. Even if doughnuts are not your thing, it pays to give this a try, you will not regret, for sure.


Baked Doughnuts ( Based on Lara Ferroni's Raised Doughnuts)
Ingredients (for about12 doughnuts)

20 grams active dry yeast
240 ml whole milk, warm
320 to 400 grams bread flour

30 grams sugar
1/2 teaspoon salt
1 teaspoon vanilla extract
3 egg yolks
60 grams unsalted butter


In a medium bowl, dissolve 15 grams of the yeast into 180 ml of the milk. Add 100 grams of the flour and stir to create a smooth paste. Cover and let rest in a warm spot for 30 minutes.
Combine the remaining milk and yeast in the bowl of a stand mixer fitted with the paddle attachment. Add the rested flour mixture along with the vanilla and egg yolks. Mix until smooth. Turn off the mixer and add 1 cup of the remaining flour and top with the sugar and salt. Mix  until the dough starts to come together. Add the butter and mix until it becomes incorporated. Add more flour, kneading the dough at medium speed between additions, until the dough pulls completely away from the sides of the bowl and is smooth and not too sticky. 
Cover the bowl with a clean teatowel and let it sit in a warm place for 30 minutes. Gently degass the dough, and refrigerate for at least 1 hour (and up to 12 hours).
Line a baking traywith parchement paper or silicone mat. Roll out the dough on a lightly floured surface to 1 centimeter high. With a doughnut or cookie cutter, cut out rounds with a center hole. 
Place the doughnuts on the baking tray separated. Let sit in a warm spot about 30 to 40 minutes.
Heat the oven to 200ยบ C, cook the doughnuts for about 20 minutes or until ligthly golden. 


Baked vegetable curry samosas


It was not too long ago that I first heard the word "samosas". I clearly remember I had eaten them only once, in a restaurant, and I remember myself thinking it was not the next big thing for me. But I thought they offered a lot of possibilities. They were a bit too greasy and heavy for me then. The ones I had were fried, and their filling was a bit too heavy. I liked the idea, but while eating them, I was already making mental notes for the changes I would do in my head.


And no, my first impulse was not making samosas. My first idea was to make vegetable pies. I had bought two types of dough: brik pastry and philo pastry, and I had quite a clear idea on what to do until I saw a dish like the one I had though of, made by another blogger for the same contest.
Yes, we have similar ideas. Yes, almost everything hs already been invented.

So making a virtue of necessity I though I had to go a step further with the vegetables and pastry, and I remembered those samosas, and in that same moment I decided that my samosas would be good, very, very  good.

To get started, I was going to put vegetables in the filling. No hummus, or other legumes. And finally, the dough had to be golden and crisp, but not fried. Should be lightly toasted and dissolve in the mouth as a wafer.

And inside, vegetables, spicy and crunchy. Some sesame seeds to add even more crunch, and some curry to decorate the plate and is all that is needed to enjoy the vegetables differently.


Baked Vegetable Curry Samosas

Ingredients: (for 8 samosas)

4 sheets of brik pastry
1 eggplant
1 onion
1 zucchini
1 red pepper
1 green pepper
1 or 2 teaspoons curry

1/2 plain yogurt (or 75 ml of coconut milk)
A few drops of Tabasco (optional)
Sesame seeds
Oil
Salt

Preparation

Cut all vegetables into medium pieces. Spread in a baking pan, sprinkle with salt, add a drizzle of olive oil and roast in the oven at 180 degrees until toasted. Turn over and repeat with the other side.

In a large skillet heat the yogurt (or coconut milk), add the curry, stir until dissolved. Add vegetables and cook with curry for 5 minutes over medium heat, to catch the flavors. Taste and add Tabasco if desired.


Mount the samosas following package directions so that they are triangular shaped. Place on a baking sheet covered with parchment paper or a silicone sheet. Preheat oven to 180 degrees, dipping slightly samosas, sprinkle with sesame seeds and bake for 7-8 minutes or until lightly toasted and crisp. Serve immediately.

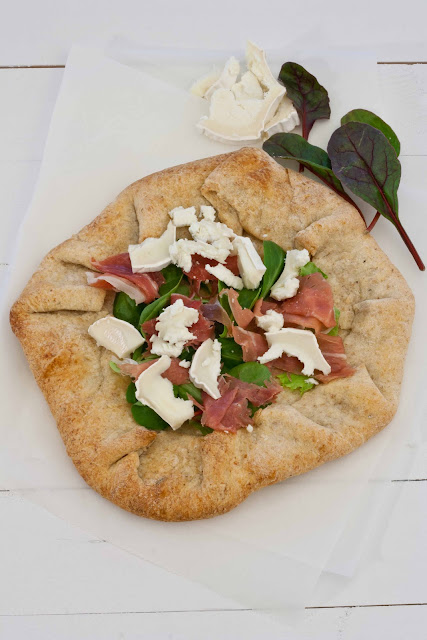
Whole wheat goat cheese, arugula and ham galette


With spring just arriving, much better whether, days getting brighter, longer and warmer, I feel more and more encouraged to make a little picnic, even if it is my own terrace.

To eat in the field or in the yard, and prepare a relaxed and simple meal -but tasty and different-, this galette is perfect. The base, with the mixture of white and whole wheat flour, acquires a special flavor that improves with the herbs. The best thing about this base is that you can cook ahead and serve with a fresh fill, like the one I've used, or put the stuffing on it before taking it to the oven and have a hot plate. If prepared in advance, it perfectly lasts for a couple of days in an airtight container. Similarly, it is also perfect with the hot filling, except that in this case it is better to add the rocket just on the table.

In good company, with a green salad and a wine glass or a cold beer, this dish announces summer is getting closer. Can you feel it?


Whole wheat  goat cheese, arugula and ham galette

Ingredients

For the base

    100 grams of wheat flour
    225 grams of white wheat flour
    1 teaspoon salt (5 grams)
    1 teaspoon sugar (5 grams)
    75 grams of cold butter cut into cubes
    50 grams of plain yogurt (whole or non fat)
    2 to 4 tablespoons cold water
    1 teaspoon dried thyme
    1 teaspoon dried rosemary
    1/2 teaspoon ground black pepper

For the filling

    Arugula leaves
    Goat Cheese
    Serrano Ham


Preparation

In a bowl, mix the flour, thyme, rosemary and pepper, salt and sugar. Add butter and mix until mixture resembles coarse breadcrumbs. While mixing, add the ice water gradually. Continue mixing until the dough holds together and is not sticky. Make a ball, flatten into the shape of disk and wrap in plastic cooking. Put in the refrigerator and keep it there at least 1 hour.

On a floured work surface, knead the dough with a rolling pin, fold the edges as in the image, putting up the dough corners. Put some oven paper on it and add some cooking beans so that the dough does not rise while baking. Place in the oven, preheated to 200 ° C for 15 minutes. Remove from oven, remove beans and paper and let cool.

In this case I made the base, I kept a couple of days in a sealed pot and used it just with the filling at the time, because I wanted a fresh filling.

If you prefer a hot filling, place it on the rolled dough, fold the ends and take it to the oven 15 minutes. Serve right in the moment.